Construction
Indoor Environmental Quality
LEED Indoor Environmental Quality
This portion of the LEED Scorecard really brings to focus all the opportunities to use clean finishes, ones with fewer emissions that contaminate the air we breathe. According to the LEED Reference Manual, Americans spend 90% of our time indoors. That means cleaning the indoor air starts from the materials we use like paint, sealant, glues, carpet, composite wood and lacquer in our interiors.
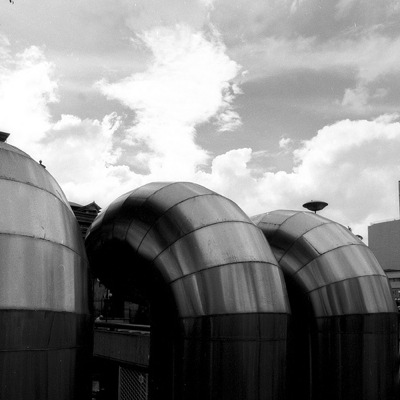
Fig 1: Exhaust Air on the Roof of a Building (Photo: Brent Buford)
The mechanical designer is also challenged to increase the amount of outdoor air that is filtered through the space, install sensors to control and monitor the HVAC system, and require that the contractor protect the mechanical system during installation.
Another point of the LEED IEQ section is to improve upon occupants’ productivity. The thought is, if people are provided with cleaner air, they will be sick less often and experience higher rates of productivity. Emphasis of this section is placed on the controllability of systems. If employees and occupants have easy access to control the temperature of their area, this will reduce hot/cold complaint calls, improve overall satidfaction and again lead back to higher productivity.
Breakdown of Each Credit in Indoor Environmental Quality – LEED v3.0
- IEQp1 Minimum IAQ Performance
This pre-requisite is easy to achieve in a state like California, as the design must simply meet ASHRAE 62-2004. The mechanical system must be designed using the Ventilation Rate Procedure or the applicable local code, (as always) whichever is more stringent.
This is based on three basic strategies for ventilating a building: 1) Active Ventilation (mechanically driven), 2) Passive Ventilation (Naturally driven), or 3) a mixture of the two.
You’ll want to remember the term “sick building syndrome” as this is a key phrase used by the industry to describe buildings that are not sufficiently removing microorganisms from the indoor atmosphere, particulate filtration throughout the system, etc.
The mechanical designer is the controlling entity for achieving this credit.
Possible Points: Zero – this is a pre-requisite.
- IEQp2 Environmental Tobacco Smoke (ETS) Control
This second pre-requisite is pretty straight-forward. In the past few decades, there has been major focus on the health hazards associated with smoking.
Many cities, yes I will reference California again, have even banned smoking within 25 feet of hospitals, malls, parks, etc. Santa Monica and San Francisco have been fore-runners in this effort, setting the standard for nearby cities.
Along these same lines, ETS control essentially confirms there will be zero exposure of non-smokers to ETS. In order to prove this pre-requisite will be met, the project has to regulate an area for smokers with negative pressure, using a pressure test to prove the smoke cannot reach any other occupants. The other way to prove this pre-req is met is to enforce a no smoking policy (by the owner).
This pre-req is largely the responsibility of the owner, and lies partially in the court of the architect, if a separate area is to be designed.
Possible Points: Zero – this is a pre-requisite
- IEQc1 Outdoor Air Delivery Monitoring
The first credit of the IEQ requires installation of permanent monitoring equipment – essentially CO2 sensors. These sensors will indicate if a space is being occupied, and the HVAC system will operate in that area if it is occupied. This is similar to a light sensor that is motion detected, turning the lights on when you enter.
This credit is more complicated than that, but the light sensors give a helpful visual to understand the theory behind this system. Essentially, this will guarantee occupant comfort, and ensure that the minimum design ventilation requirements are being met.
Ways to achieve the credit depend on whether the space is mechanically or naturally ventilated:
1. Mechanically Ventilated Spaces:
A. Monitor areas that are densely populated (with 25 or more people per 1000 SF). In these areas, monitoring equipment shall be installed 3 to 6 feet above the floor, so accurate readings will be measured.
AND
B. Monitor less densely populated areas with a direct outdoor flow measurement device capable of measuring the minimum outdoor flow rate within an accuracy of about 15%
2. Naturally Ventilated Spaces:
A. Monitor the CO2 output in all spaces. One sensor can be used for more than one area, if this location is coordinated with the flow of the natural ventilation.
The basic concept is that the building isn’t just blowing air, but rather the ventilation of an area is tied to the occupancy, population, which will govern the CO2 sensor readings. Possible Points:
- 1 Point
- IEQc2 Increased Ventilation
This credit is meant to increase outdoor air circulated to all areas 30% above the minimum required by ASHRAE 62.1 and IEQp1, in a mechanically ventilated space.
In the rare event that you are going to naturally ventilate the building, you will follow these requirements to achieve this credit:
Design Natural ventilation systems to meet Carbon Trust Good Practice Guide 237. You would also use the flow diagram presented in Figure 1.18 of the Chartered Institution of Building Services Engineers Applications Manual (if you are studying for the test you won’t need to memorize this).
It’s going to be easy to achieve this credit if the project is a drunk tank (jail), casino or a gym-type health facility. One item to be weary of is that this credit could cost points for your energy section.
The mechanical designer is responsible for ensuring this credit will be met.
Possible Points:
- 1 Point – 30% Increase in air ventilation above ASHRAE 62
- IEQc3.1 Construction IAQ Management Plan, During Construction
This credit encourages serious thought be placed on the order of installation of potential pollutants and absorptive materials. This should be documented in an Indoor Air Quality Management Plan for the construction and pre-occupancy phases of construction. The general contractor will put together the IAQ plan and document with photos to prove that the plan was implemented and followed throughout construction.
- SMACNA: The Sheet Metal and Air Conditioning Contractors National Association has guidelines for occupied buildings under construction. During construction the project shall meet or exceed these requirements.
- HVAC Equipment Protection
- Source Control
- Pathway Interruption
- Housekeeping
- Scheduling or Construction Sequencing
- Protect materials delivered to the site, specifically those materials that are absorptive
- If Air Handlers are used during construction, MERV 8 filters shall be used, and new filters installed immediately before occupancy. (Air Handlers are large commercial air conditioning units).
On the Test: You should remember the following pieces of information:
- The sources of contaminants are VOC’s, and microorganisms
- Understand the requirements of operating AC equipment prior to occupancy
- ASHRAE 52.2 is the requirement for MERV 8 filters (or better) during construction
Possible Points:
- 1 Point – develop and implement the IAQ Plan
- IEQc3.2 Construction IAQ Management Plan, Before Occupancy
The development and implementation of the IAQ Plan before occupancy is essentially a flush-out of the systems, or a one day test by an IAQ contractor.
# Flush out: There are two ways you can achieve credit for flushing out the building 100%
-
- Flush a total air volume of 14,000 cubic feet of air per square foot of floor area. Remember during this time you must maintain 60/60 – at least 60 degrees Fahrenheit and no higher than 60% humidity. This takes about 2 weeks.
- If early occupancy is desired, flush out a minimum of 3,500 cubit feet of air per square foot of floor area. Then, once the space is occupied, it shall be flushed daily, starting 3 hours prior to occupancy each day. This daily flush will take place until 14,000 cubic feet of air per square foot of floor area have been flushed (approximately one month).
–OR–
# Air Quality Testing: This is essentially a test performed by an IAQ contractor in one day. It may seem like the easiest way to achieve the point, but the final clean for a project can blow the test results. Ever get light-headed while scrubbing your bathroom? Those toxins in household cleaners are considered contaminants and will result in failure of the IAQ test.
During the final flushout, it is acceptable for Cx operations to take place, but your project should avoid cleaning, Test and Balance, and punchlist (paint) activities.
For this credit, the general contractor performing the work is responsible to prove that this credit was achieved.
Possible Points:
- 1 Point
- IEQc4.1 Low-Emitting Material, Adhesives & Sealants
Credit 4.1, 4.2 and 4.3 are similar, so pay attention to the differences. These credits apply to materials used on the interior of the weatherproofing system of a building, therefore the interior of the building.
- This credit covers Adhesives and Sealants used in the project, designated by the South Coast Air Quality Management District (SCAQMD) Rule #1168. Specific VOC (Volatile Organic Compound) limits are listed in a table in the reference manual, but you don’t need to memorize these limits, just memorize the rule.
- You should also memorize the Green Seal 36 (GS-36) rule that governs use of aerosols.
- MEPF’s will likely use adhesives and sealants in construction of their systems, so be sure to hold them accountable to the requirements of this credit.
- For this credit, the general contractor performing the work is responsible to prove that this credit was achieved, but the designer has control of the specifications. The specifications should specify low VOC materials. MSDS Cut Sheets can also prove compliance.
This point has a synergy with the IAQ test; meeting this credit’s requirements will help achieve that credit as well.
Possible Points:
- 1 Point
- IEQc4.2 Low-Emitting Material, Paints & Coatings
Credit 4.1, 4.2 and 4.3 are similar, so pay attention to the differences. These credits apply to materials used on the interior of the weatherproofing system of a building, therefore the interior of the building.
- This credit covers Paints and Coatings used in the project, limits as designated by the Green Seal Standard GS-11.
- Primers and Non-flat paints shall be held to the same requirements of 150 g/L
- Flat Paints shall be held to 50 g/L
- Anti-corrosive, anti-rust paints on the interior of the building cannot exceed VOC content of 250 g/L per Green Seal Standard GS-03
- Clear wood finishes, floor coatings, stains, sealers, and shellacs applied to interior conditions must meet the following requirements as established by SCAQMD rule 1113.
- Clear wood finishes: Varnish 350 g/L, Lacquer 550 g/L
- Floor coatings: 100 g/L
- Sealers: waterproofing sealers 250 g/L, sanding sealers 275 g/L, all others 200 g/L
- Shellac: clear 730 g/L, pigmented 550 g/L
- Stains 250 g/L
- MEPF’s will likely use paints and coatings in construction of their systems, so be sure to hold them accountable to the requirements of this credit.
- For this credit, the general contractor performing the work is responsible to prove that this credit was achieved, but the designer has control of the specifications. The specifications should specify low VOC materials. MSDS Cut Sheets can also prove compliance.
This point has a synergy with the IAQ test; meeting this credit’s requirements will help achieve that credit as well.
Possible Points:
- 1 Point
- IEQc4.3 Low-Emitting Material, Carpet Systems
Credit 4.1, 4.2 and 4.3 are similar, so pay attention to the differences. These credits apply to materials used on the interior of the weatherproofing system of a building, therefore the interior of the building.
- This credit covers Carpet Systems used in the project, designated by the Carpet and Rug Institutes Green Label Plus Program. Carpet systems include carpeting, padding, backing and fiber.
- All carpet adhesive shall meet the requirements of IEQc4.1 VOC limit of 50 g/L.
- For this credit, the general contractor performing the work is responsible to prove that this credit was achieved, but the designer has control of the specifications. The specifications should specify low VOC materials. MSDS Cut Sheets can also prove compliance.
This point has a synergy with the IAQ test; meeting this credit’s requirements will help achieve that credit as well.
Possible Points:
- 1 Point
- IEQc4.4 Low-Emitting Material, Composite Wood & Agrifiber
This credit is simple to memorize: no urea-formaldehyde resins shall be used in any of the composite wood and agrifiber products used on the interior of the building.
Composite wood and agrifiber products are defined as:
- particleboard
- medium density fiberboard (MDF)
- plywood
- wheatboard
- strawboard
- panel substrates
- door cores
Luckily furniture and equipment are not considered base building elements and are not included in this calculation.
For this credit, the general contractor performing the work is responsible to prove that this credit was achieved, but the designer has control of the specifications. The specifications should specify low VOC materials. MSDS Cut Sheets can also prove compliance.
This credit has synergies with IAQ testing IEQc3 and certified wood MRc7
Possible Points:
- 1 Point
- IEQc5 Indoor Chemical & Pollutant Source Control
The point of this credit is to reduce the exposure of occupants to chemical pollutants. This credit aims at locations within the building that have a high risk of chemical mixing, exposure to occupants.
-
- janitor’s closets
- copy rooms
- laboratories
- trash rooms
- storage closets
You will want to memorize the three strategies to achieve this credit:
- Use of entryway systems that collect particulates before they can be brought into the building (doormats at least 6 feet long in the direction of travel)
- At chemical mix zones, the use of negative pressure and outside exhausting systems should be used from structural deck to deck partitions.
- The project will use MERV 13 or better in regularly occupied areas of the building.
For this credit, multiple parties are responsible to prove that this credit was achieved: architect and mechanical engineer.
Possible Points:
- 1 Point
- IEQc6.1 Controllability of Systems, Lighting Control
This credit is aimed toward achieving lighting controllability for 90% of individual workstations. This can be tough to achieve, and can also have negative impacts on EAc1 energy performance credit.
The electrical engineer or designer is responsible to design a system that will achieve this credit. Some building types will have difficulty in meeting the requirements, simply because the application doesn’t fit the building use (gyms, factories, retail stores are all examples of projects that wouldn’t shoot for this credit).
Multi-occupant spaces are also included in this credit (think conference rooms or classrooms) and ALL of these areas also require controllability to meet the group’s needs.
Possible Points:
- 1 Point
- IEQc6.2 Controllability of Systems, Thermal Comfort
Similar to credit 6.1, which covers lighting for all applicants, credit 6.2 covers controllability of thermal systems for all occupants, to maintain comfort and increased productivity. This can be tough to achieve, and can also have negative impacts on EAc1 energy performance credit.
- This credit requires controllability for just 50% of the occupants’ thermal systems. Operable windows can be used in lieu of comfort controls to meet the credit. These operable windows must meet ASHRAE 62
- All of the multi-occupant spaces must also be controllable to suit group thermal needs and comforts.
- For the purposes of test-taking skills, you’ll want to remember that thermal comfort is defined by the following:
- Air Temperature
- Radiant Temperature
- Air Speed
- Humidity
- Referenced Standards to memorize
- ASHRAE 90.1
- ASHRAE 55
- ASHRAE 62
For this credit, the mechanical engineer/ designer must design a system to meet the requirements.
Possible Points:
- 1 Point
- IEQc7.1 Thermal Comfort Design
This credit is aimed at the design the mechanical system to cater toward comfort as described in ASHRAE 55.
Thermal comfort is defined as temperature and humidity.
The mechanical engineer/ designer is responsible for meeting the requirements of ASHRAE 55 in the mechanical design.
This credit has synergies with energy performance (EAc1) and comfort controls (IEQ6.2).
Possible Points:
- 1 Point
- IEQc7.2 Thermal Comfort Verification
This credit requires a survey be completed 6 – 18 months after occupancy to confirm IEQc7.1 was implemented as it should be.
The post-occupancy performance verification will be measured as described in the ASHAE 55 requirements.
The survey can be administered by the following:
-
- Cx Agent
- Owner
- Leasing Agent
- Mechanical Engineer
One hook is that if the survey is a total bust and more than 20% of occupants are dissatisfied, then a plan for corrective action must be developed.
Possible Points:
- 1 Point
- IEQc8.1 Daylighting & Views, 75% of Spaces
There are three options to achieving this credit – 75% of spaces shall have daylighting.
OPTION 1 Complete the calculation for daylighting (strongly suggest memorization of this calculation, and factors that are needed for the LEED online calcs):
GF = \frac{Window Area SF}{Floor Area SF} x WGF x \frac{Actual Tvis}{Minimum Tvis} x WHF
Where the following abbreviations are defined:
GF: Glazing Factor WGF: Window Geometry Factor WHF: Window Height Factor
You should also memorize the information you’d need to input in the LEED Online calculation:
- Space ID
- Regularly Occupied Space Name
- Square footage of this area
- Glazing Area square footage
- Type of glazing (daylight or vision, skylight or window)
- Tvis (the light that comes through the window Visible Transmittance)
- Glazing Factor based on properties of the glass
- Space Area with access to views
OPTION 2 Use of a daylight simulation model, which can be expensive, to prove the requirements were met. In this model, 25 footcandles shall be achieved in a minimum of 75% of all regularly occupied areas.
OPTION 3 Demonstrate through daylight measurement after the project is complete. The downside of this option is that the project must wait until completion to prove the credit was met. When time is a strong factor in certification of a building, this option is not as desirable.
Additional terms/ ideas to memorize:
- Know the difference between Daylighting and Vision glazing
- The elevation of 2′-6″ to 7′-6″ above floor level is ideal for vision glazing, to achieve views.
- The elevation above 7′-6″ is ideal for daylighting within a space.
- Skylights should face north to avoid too much sun in North America
- Vision glazing is or comfort mainly
- Trellises, and interior light shelves can help divert direct sunlight, which can be a nuisance
- Light fixtures should have sensors and dimming controls for optimum performance
- Line of sight for average seated eye height is 42″ above finish floor
For this credit, the electrical engineer/ designer is responsible for designing a system to meet these requirements, and using one of these options to prove the credit was met.
Possible Points:
- 1 Point – 75% Daylighting & Views
- IEQc8.2 Daylighting & Views, 90% of Spaces
There are three options to achieving this credit – 90% of spaces shall have daylighting.
OPTION 1 Complete the calculation for daylighting (strongly suggest memorization of this calculation, and factors that are needed for the LEED online calcs):
GF = \frac{Window Area SF}{Floor Area SF} x WGF x \frac{Actual Tvis}{Minimum Tvis} x WHF
Where the following abbreviations are defined:
GF: Glazing Factor WGF: Window Geometry Factor WHF: Window Height Factor
You should also memorize the information you’d need to input in the LEED Online calculation:
- Space ID
- Regularly Occupied Space Name
- Square footage of this area
- Glazing Area square footage
- Type of glazing (daylight or vision, skylight or window)
- Tvis (the light that comes through the window Visible Transmittance)
- Glazing Factor based on properties of the glass
- Space Area with access to views
OPTION 2 Use of a daylight simulation model, which can be expensive, to prove the requirements were met. In this model, 25 footcandles shall be achieved in a minimum of 75% of all regularly occupied areas.
OPTION 3 Demonstrate through daylight measurement after the project is complete. The downside of this option is that the project must wait until completion to prove the credit was met. When time is a strong factor in certification of a building, this option is not as desirable.
Additional terms/ ideas to memorize:
- Know the difference between Daylighting and Vision glazing
- The elevation of 2′-6″ to 7′-6″ above floor level is ideal for vision glazing, to achieve views.
- The elevation above 7′-6″ is ideal for daylighting within a space.
- Skylights should face north to avoid too much sun in North America
- Vision glazing is or comfort mainly
- Trellises, and interior light shelves can help divert direct sunlight, which can be a nuisance
- Light fixtures should have sensors and dimming controls for optimum performance
- Line of sight for average seated eye height is 42″ above finish floor
For this credit, the electrical engineer/ designer is responsible for designing a system to meet these requirements, and using one of these options to prove the credit was met.
Possible Points:
- 1 Point – 90% Daylighting & Views